Our co-founder Heather is getting ready for her fourth move in five years. At this point, you'd think she'd have moving down to a science.
Spoiler alert, she doesn't.
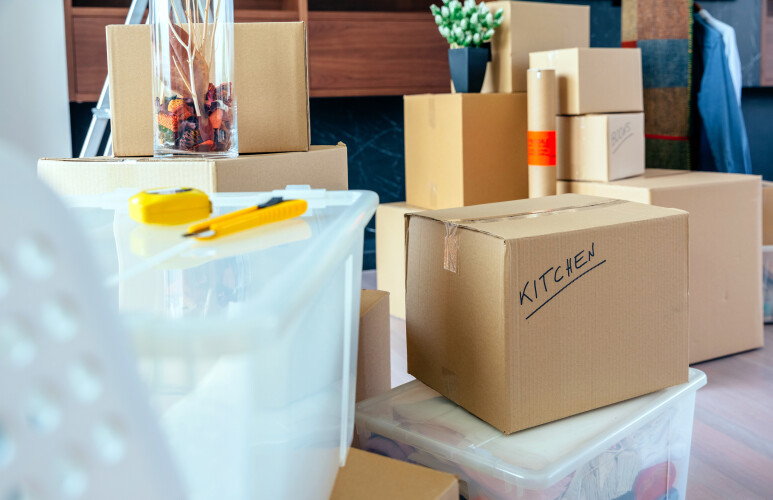
The thing is, even if you've moved multiple times, no one prepares you for the inevitable chaos. The boxes all start out neatly taped and labeled. Then somehow, hours later you find yourself surrounded by a sea of cardboard, balled up packing tape, and a child on the verge of a meltdown screaming "Mom, where's Shimmering Star?" For the record, Shimmering Star is the stuffed bunny you repeatedly reminded said child NOT to pack in a box and instead carry in their day pack.
Bonus points if your spouse simultaneously chimes in with, "Honey, where'd you put the coffee maker?" while the dog is desperately looking your way with his patented, please-tell-me-you-remembered-my-kibble-mom look.
Moving has a remarkable way of making even the most organized person question every life choice that led to accumulating so much...stuff.
The good news? While you can't eliminate every "Where's the XYZ?" moment, you can make the entire process dramatically easier by getting organized before you pack your first box.
It's tempting to start packing as soon as you know you're moving, but taking the time to declutter and organize first will save you time, money, and stress. Even better, it's the perfect opportunity to preserve the stories and details behind the belongings that matter most with Artifcts.
Step 1: Declutter Before You Pack
Why pay to move things you no longer need, use, or love?
Every box you eliminate means less to pack, less to transport, less to unpack, and less to find a home for in your new space. Decluttering before a move also gives you a fresh start, allowing your new home to reflect your current lifestyle—not years of accumulated "just in case" items.
If you're wondering where to begin, consider tackling items like:
- Duplicate kitchen gadgets and cookware
- Clothing that no longer fits or hasn't been worn in years
- Expired pantry items and medications
- Old paperwork and manuals that can be securely shredded or recycled
- Broken electronics and tangled cords
- Outgrown toys and games
- Decorative items that no longer match your style
- Boxes of forgotten keepsakes you've been storing "for someday"
Our article, 108 Objects to Declutter from Your Home, offers even more ideas to help you make meaningful progress room by room.
As you sort, remember that decluttering doesn't have to mean losing the memories attached to your belongings. If you want to keep the memory of those keepsakes while maybe not the actual items, take a moment to snap a photo and create a quick Artifct in our App. You can always go back and add the details later.
Step 2: Organize What You're Keeping and Artifct Before You Move
Once you've decided what deserves a place in your next home, resist the urge to immediately start boxing everything up. This is the ideal time to organize and Artifct your most meaningful possessions.
Think about family heirlooms, artwork, collections, antiques, military memorabilia, jewelry, childhood keepsakes, vintage toys, furniture, and other objects that tell the story of your life and your family. Heather also likes to Artifct anything that is or has the potential to be breakable, which with a 75-pound golden retriever underfoot is quite a long list!
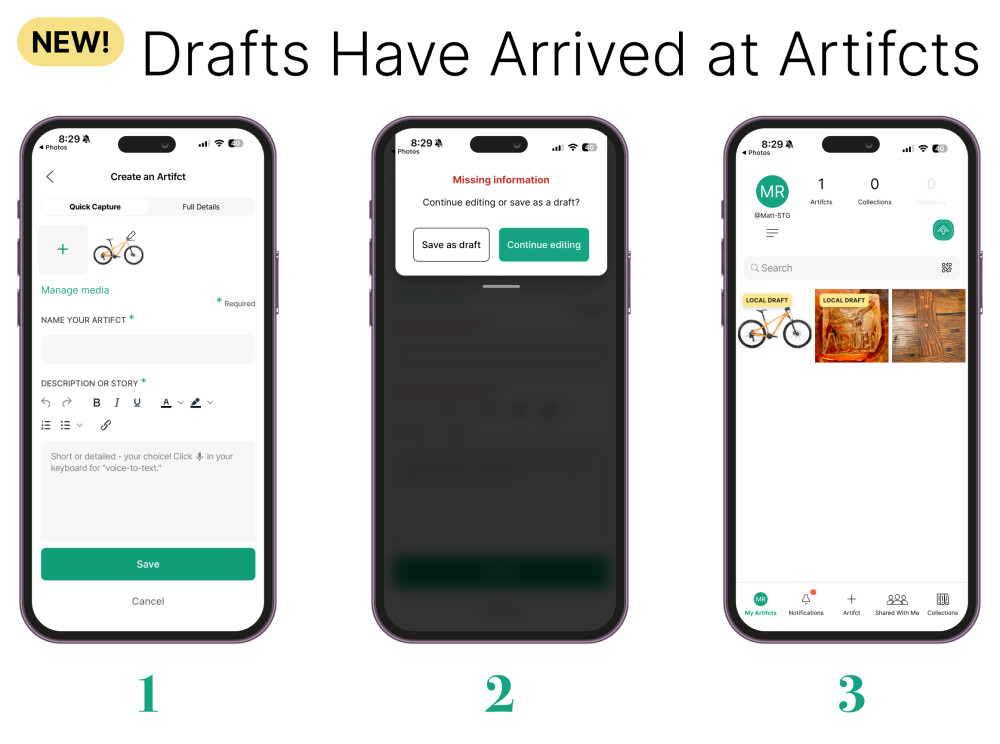
Before those items disappear into moving boxes, take a few minutes to:
- Photograph each item.
- Record its story, history, and significance.
- Note its current condition.
- Attach any appraisals, receipts, or insurance information.
Not only are you preserving memories, you're also creating a digital record that can be invaluable later.
No matter how careful your movers are, accidents happen. Boxes get crushed. Furniture gets scratched. Artwork can be damaged. Sometimes items are even lost.
When you've already created an Artifct, you have:
- Photos showing the item's pre-move condition.
- Documentation of identifying features and provenance.
- Purchase information or appraisals when available.
- A centralized place to store supporting documents.
This information can make insurance claims much easier should something unfortunate occur during the move.
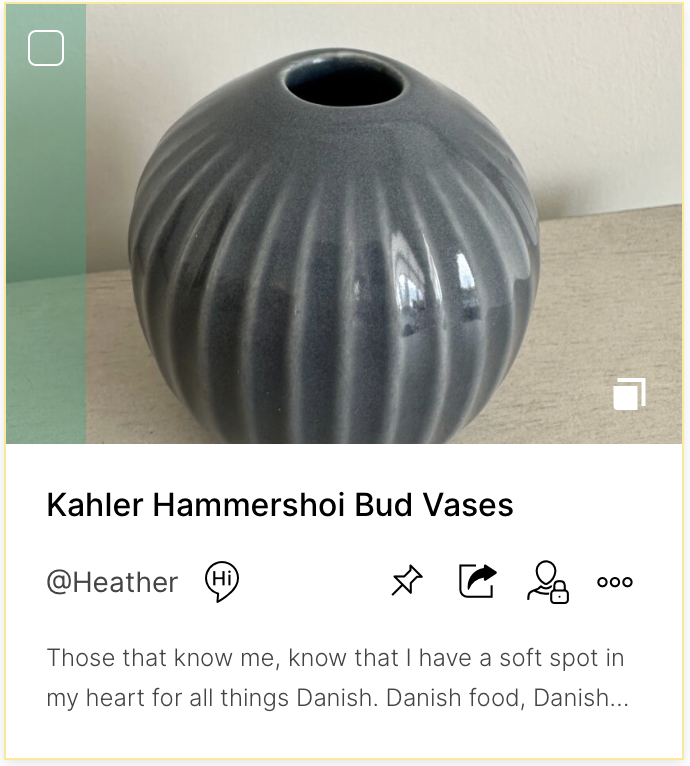
Our co-founder Heather Artifcts anything breakable before a move as life always has a way of happening...
And for the items that simply can't be replaced—a grandmother's quilt, a handwritten recipe book, a child's first artwork, or your grandfather's military medals—you'll always have their stories preserved, regardless of what happens to the physical object.
After you've decluttered, organized, and Artifcted what matters most, packing becomes far more intentional. You'll know exactly what you're moving and which items require extra care. Instead of simply moving boxes, you're moving the pieces of your life with confidence—and protecting both the objects and the stories they carry.
Let Go Without Losing the Story
One of the hardest parts of moving or downsizing is deciding what to part with. Matt Paxton, author, television personality, and longtime advocate for helping families through life's transitions, beautifully captures why Artifcts changes that experience:
"Take a picture, tell the story in Artifcts, and you can donate it away. The story lives on, and the memory lives on, and the person lives on. You don't need the item to do that."
When the memories are preserved, letting go of the physical object often becomes much easier. Families can confidently donate treasured belongings, knowing the stories behind them remain accessible for future generations.
Make Your Next Move Your Most Organized One Yet
Moving is more than changing addresses. It's an opportunity to decide what deserves space in your next chapter.
With Artifcts, you're not just preparing for moving day. You're protecting your memories, simplifying insurance documentation, making downsizing easier, and ensuring that the stories behind your most treasured belongings live on for generations to come.
###
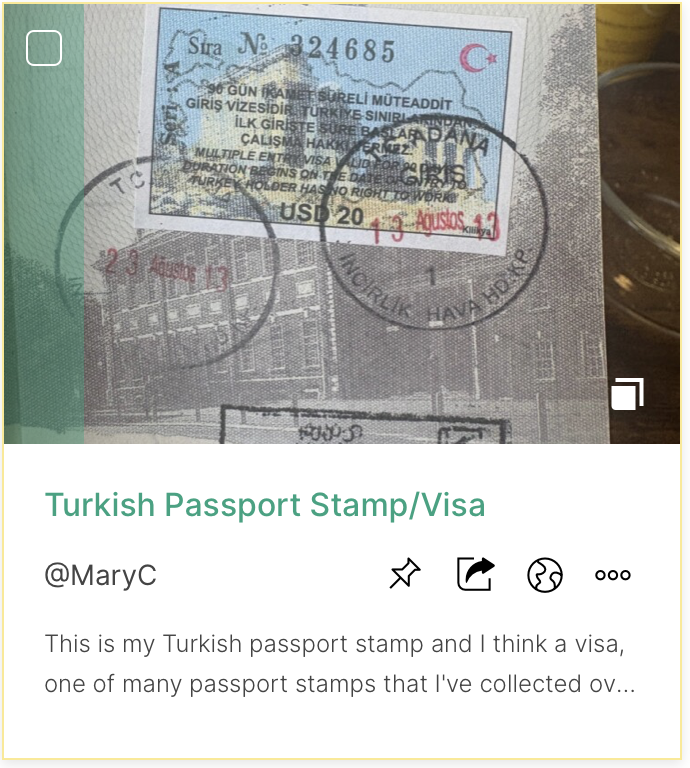
Looking for more ideas on how to Artifct during or after a move? One of our Artifcts community members, who grew up in a military family, shared that they Artifct the house they are moving from prior to the move so that they will always be able to remember what the house (and rooms!) looked like. We love this idea! Sometimes Artifcting those big items (like a house, car, etc.) may not seem obvious at first, but they are just as important as the small items we tend to Artifct most.
© 2026 Artifcts, Inc. All Rights Reserved.